How to Bolt a Squat Rack or Power Rack to the Floor

When and Why Bolting Your Rack Is Necessary
Securing your squat rack or power rack is crucial for safety, especially if you're lifting heavy or doing dynamic exercises.
A wobbly rack can lead to accidents, so bolting it down is often the best solution. If your rack isn't stable, it can shift or tip over, putting you at risk of injury.
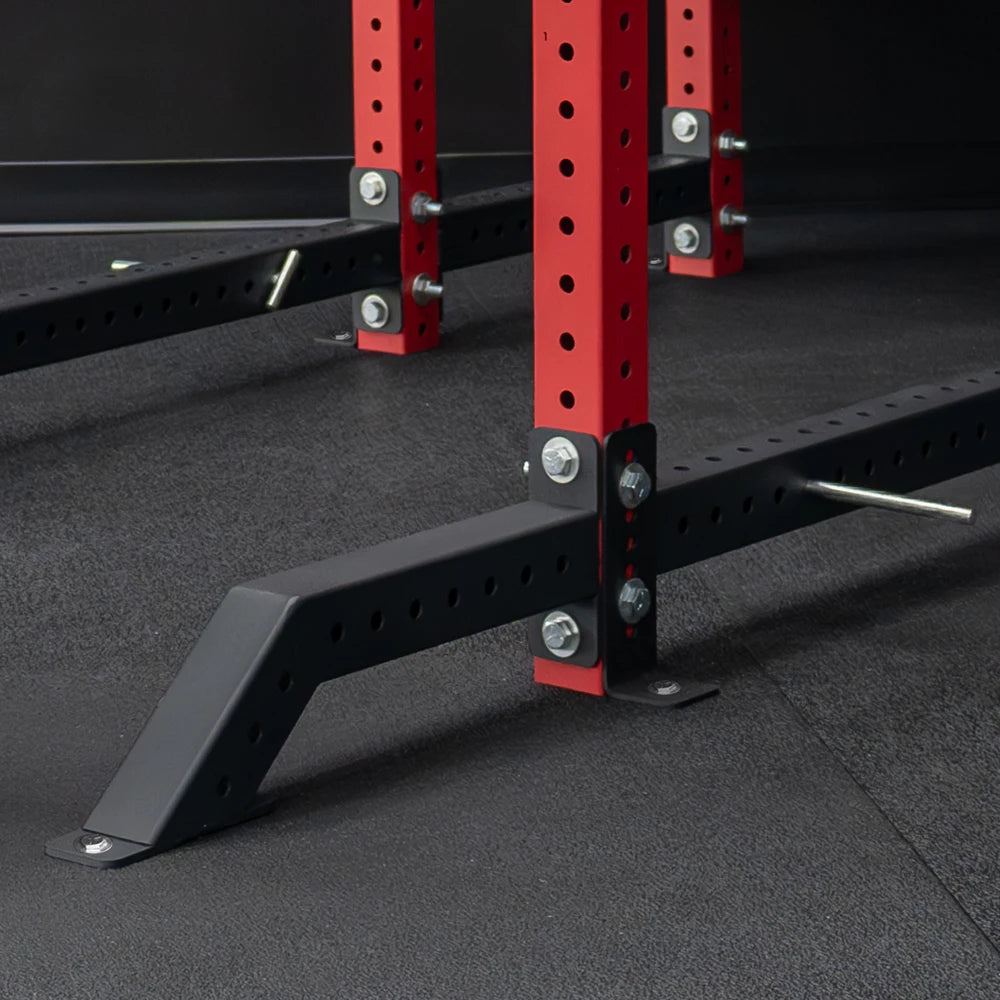
Before you start, check if your rack is designed to be bolted down. Some models have pre-drilled holes for this purpose. If yours doesn't, you might need to consider other stabilization methods.
The setting also matters. Home gyms might not need bolting as much as commercial ones, where racks face heavier use and need more stability.
If bolting isn't an option, you can explore alternative methods like using weight plates to stabilize the rack. But keep in mind, these alternatives might not offer the same level of security as bolting.
Preparing to Bolt Your Rack
First, assess your flooring. Concrete is ideal for bolting, while wood requires extra precautions to avoid damage. Make sure your floor can handle the installation process without compromising its integrity.
Gather the necessary tools and materials. You'll need a drill, masonry bits, wrenches, anchor bolts, and washers. Don't forget safety gear like gloves and eye protection to keep yourself safe during the process.
Before you begin, read the manufacturer's instructions for your rack model. Following these guidelines ensures a proper and secure installation. Each rack may have specific requirements, so it's essential to check.
Not sure if a bolted-down rack is right for you? Compare it with flat-footed designs in our article ‘Securing Your Squat or Power Rack: Bolted vs. Flat-Footed Designs Explained’.
Step-by-Step Installation Guide
-
Position the Rack
- Place the rack in your desired location with enough space for safe movement.
-
Mark Drilling Points
- Use the rack's base holes to mark exact spots on the floor.
- Double-check measurements for accuracy.
-
Prepare the Area
- Clear debris from the floor.
- Ensure no wiring or pipes are beneath the marked spots.
-
Select Anchors and Tools
- Choose appropriate anchors and drill bits for your floor type (concrete, wood, etc.).
-
Drill the Holes
- Drill holes at the marked points to the required depth.
- Maintain steady pressure for clean holes.
-
Clean the Holes
- Remove dust and debris to ensure proper anchor installation.
-
Insert Anchors
- Place anchors into the holes following the anchor's manufacturer's instructions.
-
Secure the Rack
- Align the rack over the anchors.
- Attach washers and nuts, then tighten securely.
-
Verify Stability
- Check all bolts are evenly tightened.
- Test stability by applying force in different directions.
To understand all the factors before bolting down your rack, check out ‘Do Power Racks Need to Be Bolted Down? Key Factors to Consider for a comprehensive overview.
Customizing Anchoring Techniques
For concrete floors, use the right drill bits and anchors to ensure a secure fit. Concrete provides a solid base, but it's essential to follow best practices to avoid cracking or damaging the surface.
If you're working with wooden floors, additional supports might be necessary to prevent damage. Consider using mats or platforms to distribute the weight and protect the flooring. This approach helps maintain the floor's integrity while providing the necessary stability.
If you can't drill, there are non-permanent solutions available. These methods are ideal for renters or temporary setups, allowing you to stabilize the rack without making permanent changes to the floor.
Maintenance and Long-Term Stability
Regular inspections are essential to ensure your rack remains secure over time. Check the bolt tightness and the rack's condition periodically. Address any signs of wear and tear promptly to maintain safety.
If you notice any issues, replace the hardware as needed. Keeping an eye on the condition of your rack and its components helps prevent accidents and ensures a reliable setup.
Should you decide to move the rack to a new location, follow the necessary steps to ensure it's securely anchored in the new spot. This process may involve re-drilling and installing new anchors.
Safety Tips
Avoid common mistakes by taking accurate measurements and using the right tools. These steps are crucial for a successful installation. If you're unsure about any part of the process, consider hiring a professional installer to ensure the job is done correctly.
As a user, it's your responsibility to maintain a safe workout environment. Regularly check the rack's stability and make any necessary adjustments to keep it secure.
Alternatives to Bolting Down
If bolting isn't an option, consider flat-footed racks. These designs don't require bolting and provide stability without permanent installation. They're a great choice if you need a flexible setup.
Another option is weight-based stabilization. You can use additional weight to secure your rack, but keep in mind this method might not offer the same level of security as bolting.
As manufacturers of premium home gym equipment, we design flat-footed racks, weight-stabilized racks, and wall-mounted racks to deliver stability, versatility, and space-saving solutions tailored to your fitness needs.


